Astronomy - Working with FITS Images
FITS, the Flexible Image Transport System, is an open standard digital file format widely used in astronomy for representing and working with 2D images.
This section demonstrates a range of tools for accessing and working with FITS image data.
astropy
The astropy package provides “a common core package for Astronomy in Python” with the intention of fostering “an ecosystem of interoperable astronomy packages”.
Let’s start with an example of downloading an image file in the FITS format from an known location:
from astropy.utils.data import download_file
from astropy.io import fits

horsehead_url = 'http://data.astropy.org/tutorials/FITS-images/HorseHead.fits'

#image_file is the path the downloaded and locally stashed file
image_file = download_file(horsehead_url, cache=True )
image_file
'/Users/tonyhirst/.astropy/cache/download/url/ff6e0b93871033c68022ca026a956d87/contents'
hdu_list = fits.open(image_file)
#hdu_list.info()

#save file under another name in the local directory: hh.fits
import os

if 'hh.fits' not in os.listdir():
    hdu_list.writeto('hh.fits')
import matplotlib.pyplot as plt
#Nice styling
from astropy.visualization import astropy_mpl_style
plt.style.use(astropy_mpl_style)
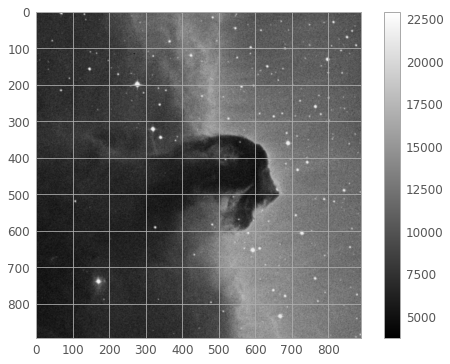
image_data = fits.getdata('hh.fits')
#Display the image
plt.imshow(image_data, cmap='gray')
plt.colorbar();
aplypy
aplypy, the Astronomical Plotting Library in Python, is a Python module aimed at producing publication-quality plots of astronomical imaging data in FITS format using matplotlib.
Import the package and render a local fits file:
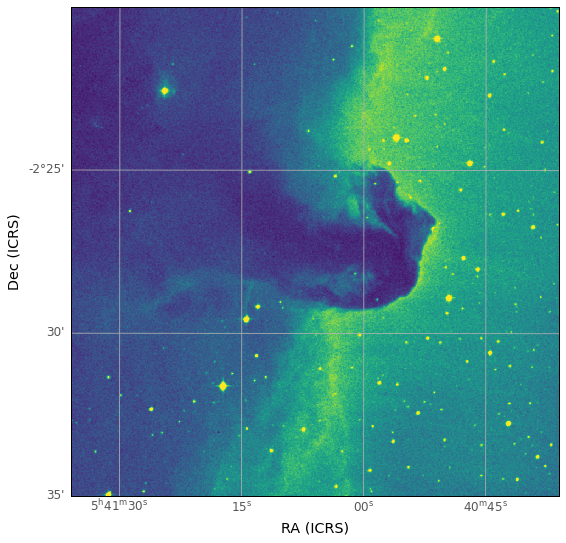
import aplpy

hh = aplpy.FITSFigure('hh.fits')
hh.show_colorscale()
INFO: Auto-setting vmin to  3.689e+03 [aplpy.core]
INFO: Auto-setting vmax to  1.925e+04 [aplpy.core]
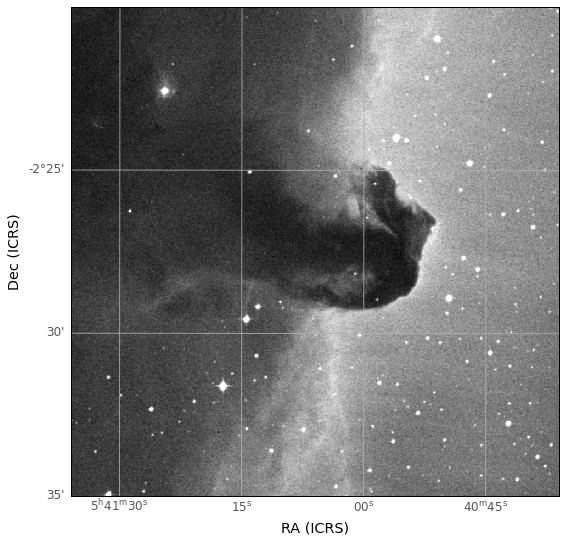
We can also view the image in grayscale:
# Close the previous image session
hh.close()

hh = aplpy.FITSFigure('hh.fits')
hh.show_grayscale()
INFO: Auto-setting vmin to  3.787e+03 [aplpy.core]
INFO: Auto-setting vmax to  1.845e+04 [aplpy.core]
hh.close()
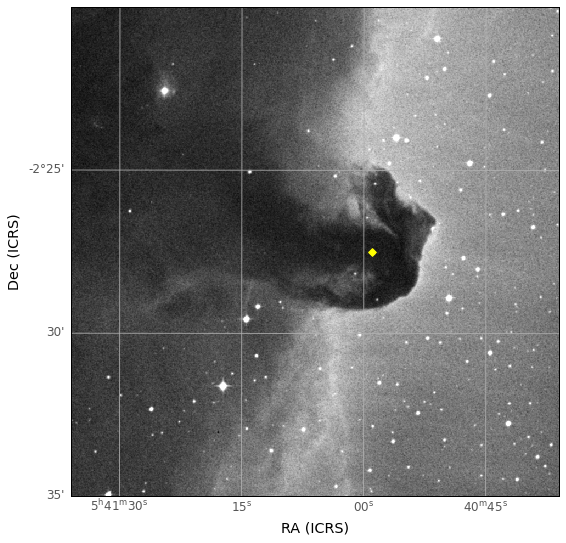
The aplpy package plays nicely with the astropy package. For example, we can render a graysclae image and then overlay it with a marker using coordinates obtained from a call to astropy.coordinates for the centroid of the ‘Horsehead Nebula’:
from astropy import coordinates

hh = aplpy.FITSFigure('hh.fits')
hh.show_grayscale()

# We can lookup data for astronomical objects by name
HORSEHEAD_NEBULA = 'Horsehead Nebula'

horsehead = coordinates.SkyCoord.from_name(HORSEHEAD_NEBULA)
hh.show_markers(horsehead.ra.deg, horsehead.dec.deg, marker='D', c='yellow')
INFO: Auto-setting vmin to  3.694e+03 [aplpy.core]
INFO: Auto-setting vmax to  1.923e+04 [aplpy.core]
hh.close()
astroquery
The astroquery package provides a range of tools for querying astronomical data services and retrieving images from them:
For example, we can look up a record by name on the SIMBAD Astronomical Database:
from astroquery.simbad import Simbad

result_table = Simbad.query_object("Horsehead nebula")

result_table.to_pandas().T
| 0 | |
|---|---|
| MAIN_ID | NAME Horsehead Nebula |
| RA | 05 40 59.0 |
| DEC | -02 27 30 |
| RA_PREC | 5 |
| DEC_PREC | 5 |
| COO_ERR_MAJA | NaN |
| COO_ERR_MINA | NaN |
| COO_ERR_ANGLE | 0 |
| COO_QUAL | D |
| COO_WAVELENGTH | |
| COO_BIBCODE |
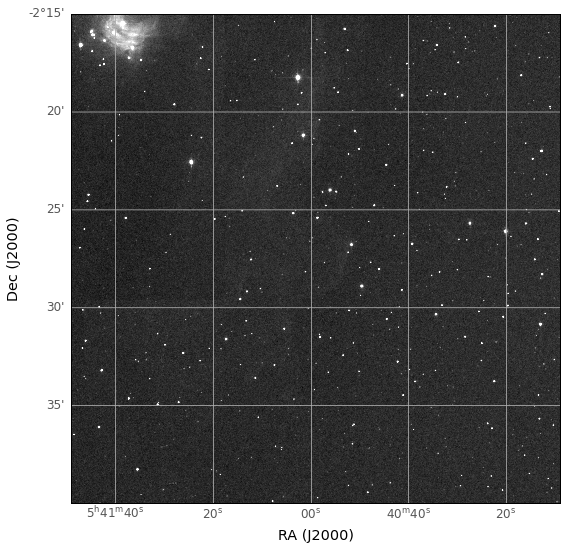
Or we can download an image by name from the Skyview virtual observatory:
from astroquery.skyview import SkyView

hh2_images = SkyView.get_images(position=HORSEHEAD_NEBULA,
                                survey=['2MASS-K'], pixels=1500)

hh2_images
[[<astropy.io.fits.hdu.image.PrimaryHDU object at 0x12b8662b0>]]
Let’s save the file and then preview it:
import os

out_file = 'hh2.fits'

if not os.path.isfile(out_file):
    hh2_images[0].writeto(out_file)

hh2 = aplpy.FITSFigure(out_file)
hh2.show_grayscale()
INFO: Auto-setting vmin to  5.163e+02 [aplpy.core]
INFO: Auto-setting vmax to  5.508e+02 [aplpy.core]
hh2.close()
astrowidgets
The astrowidgets pckage provivdes a scripable image viewing widget for exploring FITS images.
For example, let’s load the widget:
from astrowidgets import ImageWidget

image = ImageWidget()

image
And then load an image into that widget at a particular zoom level and a centered on location co-ordinates grabbed from a co-ordinate lookup:
image.load_fits(out_file)

from astropy.coordinates import SkyCoord

image.center_on(SkyCoord.from_name(HORSEHEAD_NEBULA))
image.zoom_level = 2
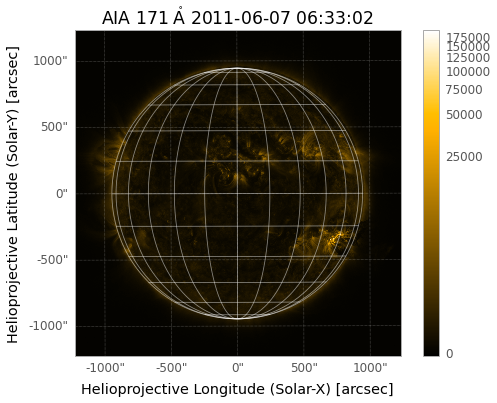
sunpy
The sunpy package provides a wide range of open source solar data analysis tools.
Let’s try a quick demo:
import sunpy.data.sample
import sunpy.map

aia = sunpy.map.Map(sunpy.data.sample.AIA_171_IMAGE)
aia.peek()

By default, we’re expected to use matplotlib to view images, so we’ll create a simple utility function to help us do that.
import matplotlib.pyplot as plt

import sunpy.map

def plot_image(imagefile, limb=False, grid=True, colorbar=True):
    ''' Quick function to help display of solar images. '''
    fig = plt.figure()

    m = sunpy.map.Map(imagefile)
    #ax = plt.subplot(111, projection=m)
    m.plot()

    if limb:
        m.draw_limb()
    if grid:
        m.draw_grid()
    if colorbar:
        plt.colorbar()

    plt.title=None
    plt.show()
Let’s use our convenience function to render a demo image:
plot_image(sunpy.data.sample.AIA_171_IMAGE)
We can remove the grid and colorbars if required:
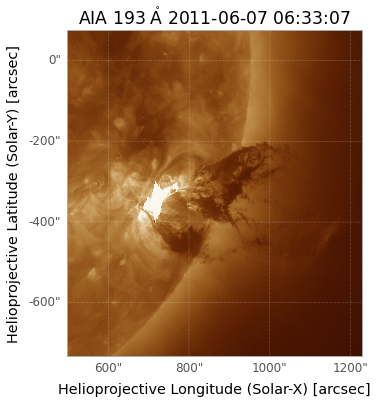
plot_image(sunpy.data.sample.AIA_193_CUTOUT01_IMAGE,
           colorbar=False, grid=False)